Search This Blog

Translate

Tuesday, December 15, 2015

Hp Compaq Presario CQ62 Repair

Re-Heating

How to repair Hp Compaq Presario CQ62 Laptop

One of the common problems of some laptops repair, the power light is on and when you press it we can see that the fan will start, but the hard drive lights or other lights flashing. 

After a while, he would stop working fan. If we re-launched laptops will not change the result. The repair, the first step to cleaning RAM, and the RAM slots. If the problem is resolved, repair work is finished.


If the problem persists, you should know what this stage is more difficult and should be carefully framed to open the Hp Compaq Presario CQ62 laptop up and down according to what you see in the video, to access the main board Hp Compaq Presario CQ62 laptop.

The problem emerged as a result of overheating the environment and the laptop, which makes the connections IC graphic and isolated. For repair, we need to re-heat the IC graphic to re-connect to the initial state return.

To do that you need to have the device re-heat. Remember, heated to 300 degrees Celsius for three minutes and two centimeters should be maintained between IC graphic with heating.

After heating, cooling is required to thirty minutes. To avoid errors and achieve a satisfactory result, carefully follow the video.

Good luck and thanks for visiting.


Sunday, October 11, 2015

Dell Laptop doesn't work speakers

Dell laptop top view

Audio socket position

Dell Laptop bottom view

Dell Audio socket input

Dell Laptop doesn't work speakers


In this talk, we consider the problem of noise in the speaker output. I saw many Repairmen, when faced with the problem of laptop repair deterred and returned to the customer. I decided to upgrade information for laptop users, the issue cleave.

Lack of voice in the speaker output are as follows:

1. The operating system does not recognize the sound card.

2. The operating system recognizes the sound card but does not sound speakers, not the headset.

3. The operating system has recognized the sound card, headset play sound, but laptop speakers, does not sound.


In two first cases, we have to have suitable sound card driver for the install and make sure the speakers cables properly attached.

About the number one most likely need to be replaced or re-heating the IC graphics or sound.
About the second is with ensuring said at the driver installation is the fault.

The main discussion topic is About the number three that, you should first test the speaker cable and speaker that if we have to ensure their health. According to the above figures, we must change the audio socket.

The socket has a spring to mute the speaker's voice when we enter the headset jack. Spring pressure to close and cut off the speaker. When we remove the headset jack, spring returns to normal operation. The speaker is connected.

When, for whatever reason does not perform his duty spring, the always socket in your headset will continue to work.
So by switching socket sound speakers can be used again.
This fault is common at all means of electronic sound playback.


Thursday, August 6, 2015

Samsung Syncmaster 2033sw Backlight


It is recommended that you watch video on maintenance
training.


LCD Monitor Samsung Syncmaster 2033sw

Samsung Syncmaster 2033sw Backlight


 Plug in the power cord of the LCD Monitor for the Samsung Syncmaster 2033sw so that the LED light is blue, but the LCD Monitor doesn't have the backlight to show pictures on the screen.When the power LED is blue that means that the signal is received on the LCD Monitor from the Computer. If it doesn't connect to the Computer the "NO Signal" message will show.  The problem is caused by 
having No Backlight, but everyone calls it 'No Display'.  We are going to fix the "No Display/No Backlight" problem on the Samsung Syncmaster 2033sw LCD Monitor.
If you want to be a Technician or just need to repair your own monitor, please watch the movie carefully until the end and don't give up. 
The first step of troubleshooting is to have a torch(flashlight) or your handphone flashlight.  Plug in the power cord of the LCD monitor and turn it on. Now shine the flashlight onto the LCD Screen.  You will see the "No Signal" Message on the LCD Screen. This means that the problem is "No Backlight". We can repeat the test by connecting the RGB cable to the VGA monitor's connector. You will be able to see the Windows background on the screen when you shine the flashlight on it.


Step 1: Disassemble the Samsung Syncmaster 2033sw Monitor


In this model, there is no need to remove the stand from the monitor, because the stand is attached to the back cover and is not a barrier to separate the front and back covers. To prevent scratching on the front cover and the screen, use a towel on the table. Place the desktop's monitor face down so that the screen is on the table. (As you can see in the Video, I have a wide strip of plastic on the desk).  Unscrew the two screws at the bottom of the back cover. Now turn the monitor over and take off the front cover. Turn the monitor over again.


Step 2: Disconnect the PowerBoard and Repair It


We have 7 cables to disconnect:
1 LCD Cable 
1 Keyboard Cable
4 Lamp Cables (in this model there are 4 pieces) 
1 Power cable (between Powerboard & Mainboard) 
The Powerboard has two sections - voltage +19V and +5v section and Inverter section with high voltage for Lamps.
When you look at the Board you will see that the Inverter Transformer is burnt so it is brown.  This means that the Inverter transformer needs to be exchanged.  After exchanging the Inverter Trans, we are going to test the monitor before re-assembling it.  Now we should have a Backlight on the LCD Screen.

Notice: If you don't have the inverter transformer I have a suggestion how to repair it in another post.  

Step 3: Reassemble the Monitor for Samsung Syncmaster 2033sw


We have to carefully connect all the connectors, because if any connector does not connect we could have a new fault in the LCD monitor.  Watch the video to the end for assembling the Samsung Syncmaster 2033sw LCD monitor.


Friday, June 19, 2015

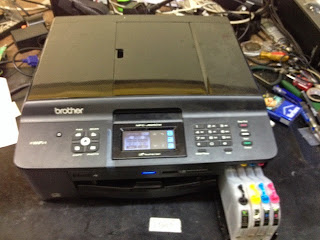
Brother MFC-J625DW paper unclear


LCD Brother MFC-J625DW
Brother MFC-J625DW


How to repair Brother MFC-J625DW printer when the paper comes out Blank or is unclear  


Inkjet printers, if not used for a long time, will possibly stop working.  The print head becomes dry. It should be noted that these printers should be used at least once a week. When the White Paper comes out or illegible lines are printed, the print head is giving trouble.  First ensure all the inks,(four colors) are filled.  To repair this problem we must clean the print head nozzles.

Brother Printers have menus.  Use the up and down keys from the menu. In this model, press the Menu button and select the 'cleaning head', then 'select all'. The printer will start cleaning the print head and we have to wait until the print head stops moving.

When the printer head stops cleaning, add print paper to the paper tray and select 'Print quality testing'.   Then wait to see the results of the test print. If the test is completed, this means that the print head nozzles are open. Otherwise, repeat this step to clean the head.

It should be noted that this step does not consume a lot of ink, and does not need to be followed more than three times. It is better to turn off the printer and wait twelve hours, then try again and this time if the print head nozzles are still not open, then you must change the print head.


Tuesday, June 16, 2015

HP 1502 LCD Monitor Backlight


It is recommended that you Watch Video on maintenance training.


LCD Monitor HP 1502

LCD Monitor HP 1502 NoBacklight


I have LCD Monitor Hp 1502 that doesn't have a Backlight. The LCD monitor has the image, but no light to illuminate the screen. As you will see in the Video, first open the back cover screws.  Remove the back panel of the monitor to access the Power Board. The capacitors when spoilt in the monitor, will bulge or appear swollen. Replace the bulging capacitors with the same capacity or more.

I suggest that a higher voltage capacitors be used to avoid the risk of the same problem repeating. For example, if the capacitor is 220uf 16V then replace with a capacity of 220uf or 330uf and if it is 16V then replace it with 25V.  After switching the capacitors, it is also important to do the ohm test on the MOSFET (C5707) inverter transformer driver.  One or both of the MOSFET inverters could have a short circuit.

To avoid a repeat of this problem, change the MOSFETS and Inverter's transformers at the same time.

After replacing the parts, follow the Video on how to close the monitor. 

A few tips:

1. The lamps can be connected in any sequence.

2. After replacing the parts and cutting the extra base on the components, please take a soft brush and carefully wash them with alcohol.

3. Always align the frames and complete the test before closing the monitor.

4. Carefully tighten all screws.

5. Please use gloves during repairs, to prevent static electricity.

6. If you do have not watched the video until the end, do not attempt this repair.

7. If you found this blog useful, please share it with your friends.

8. I am always willing to answer questions, even those that are not 
    currently found in this blog.


Monday, June 15, 2015

HP 7830 Printer detect cartridges


It is recommended that you watch the video on maintenance 
training.


HP Photosmart 7830

HP 7830 Printer detect cartridges 


HP Photosmart 7830 Printer or Inkjet Printers usually have some errors when installed cartridges can't be detected.  This means that we have a problem between the cartridges and the printhead. 

Open the printer cover and wait for the printhead to be in the middle then open the cartridges doors and reinstall the cartridges properly. If the problem still persists then we have to clean the printhead. 

Clean the cartridges connector and printhead connectors with a cotton ear bud and alcohol as seen in the video.  Wait ten minutes for it to dry.  If you turn on the printer and install the cartridge before it is dry then you will damage the printhead. 

After 10 minutes of drying time, install the cartridge and turn on the printer.   If the problem is clear, well done. If you still have the same error then we have to replace the cartridges with a new and original cartridge.


Samsung Syncmaster 743nx LCD Monitor Blinks


It is recommended that you watch video on maintenance
training.


Samsung Syncmaster 743nx

Samsung Syncmaster 743nx LCD Monitor Blinks


Welcome to solving the LCD Monitor Syncmaster 743nx problem. I am grateful that you selected my blog and especially this Post.  I welcome your comments and "Questions".

When the PowerLED is blinking in the monitor this means that you have a problem with the Inverter section that uses +12V/+19V to make a High Voltage (voltage depends on the design up to about 180V AC). 

You need to use a  Higher Voltage AC in the inverter section.

An Inverter makes an AC Voltage turn on Lamps. We know that any LCDScreen has an Inverter for the Lamps (Backlight ).

When the PowerLED is blinking blue that means +12V/+19V is not the correct voltage needed to start the Inverter. Some capacitors are spoiled or the MOSFET has a Short Circuit. When you watch the video, you will be able to see the bulged capacitors. 

Someone asked me "Do we have to exchange Capacitors with the same numbers (1000uF,16V)"? My answer is "Absolutely Not". I prefer to exchange the bulged capacitor with a higher capacity  "Voltage" (1000uF,25V).

"How about when the LCD Screen is blinking?" This means  that the Inverter OutPut or a Lamp is faulty. In the video, the engineer exchanged the Inverter Transformer because he saw that the PCB board around the Transformer was burned. 

If you are interested in learning more about electrical repairing or to improve your knowledge, please follow the link and watch the full video and read to end where you will find  " A few tips."


Samsung Syncmaster 2043swx NoPower


It is recommended that you watch video on maintenance
training.


Samsung Syncmaster 2043swx

Samsung Syncmaster 2043swx NoPower


Hello to all of you, One of the common faults of LCD monitors is that they stop working. There are many causes of this problem of NoPower in the LCD Monitor.

Possible causes:
1- Fault in primary section on Powerboard 
2- Secondary section on Powerboard can't provide +5V.
3- The Mainboard is faulty.

Make sure the power cord connects directly from the socket. Check that the power cord is not the problem.
Fault detection is more important than troubleshooting because you cannot repair electronic boards if you don't know what the real cause is. 

How long will it take to repair an electronic board?   That depends on how long you need to detect the fault. Find the problem time  +  troubleshooting Time (a few minutes)  =  repair time 

Total Repairing Time depends on your experience of fault detection. 

Watching is the best learning method for any kind of skills. Practical/practice is important after watching the video.  That's why I asked you to watch the video from beginning to end.   


You need to open the monitor's cover, unscrew some screw from the chassis to access the Power Board.  To know how to do this, you need to Disassemble Monitor.


Now you have one power board in your hand.  The power board has three sections:
1- Primary section 
2- Secondary section 
3- Inverter section 


You can see in the video that a filter capacitor bulged. Usually, you find Filter Capacitor by 68uF, 86uF, 100uF or 120uF in different designs of  Power Boards.  We replace the spoilt capacitor with 100uF 400V capacitor.

Please be careful after replacing the components and to know how to reassemble the monitor follow A few tips.


Saturday, June 13, 2015

Samsung Syncmaster 943nx LCD blinks


It is recommended that you watch video on maintenance
training.

Samsung Syncmaster 943nx

Samsung Syncmaster 943nx LCD blinks 


We are going to solve the problem for any brand of  LCD Monitor when the LCD Screen blinks.

If you are interested in learning something more about "Electronics Repair" I Suggest you watch the video from beginning to end carefully on how to open the cover's of the "LCD Screen" without breaking it. To avoid a fault when Opening LCD Monitor cover.

You just saw how to change the bulged capacitors in the video. Sometimes we can't see any bulged capacitors. Now I am going to teach Electronic "fault detection".

Electronic Fault Detection 


I suppose you know about the Ohmmeter.

The fuse must be tested with the ohmmeter. If the fuse has an open circuit, this means the primary section of the Powerboard has a short circuit.   If the ohmmeter shows a short circuit on the fuse, then the Powerboard is working.

In the secondary section the Powerboard has two Diodes.  With the ohmmeter test the diodes one by one.  One of them provides the +5V and the other one +12V.  When the PowerLED  light is on blue this means the +5V diode is working as well.

Now we have to test the capacitors in +12V circuit on the ohmmeter. Take out the capacitors one by one and test each one again.  If the ohmmeter shows a short circuit on one of them, that means the capacitor needs to be replaced. 

If the capacitors and diode do not have a short circuit, then one of the two MOSFETs has a short circuit. Then we need to replace the MOSFET.  You will usually find the LCD Monitor's MOSFET is difficult to find. I have a solution when we don't have an MOSFET.


Related Post:

Samsung 540n ,


Thursday, June 11, 2015

NEC NP60 Video Projector Auto Off


It is recommended that you watch video on maintenance
training.
NEC NP60 Video Projector


Any brand of Video Projector (Data Show Projector/ LCD Projector) has a common problem with the Auto Off when it has been used more than one thousand hours. Users complain that the Video Projector goes on but after a few seconds will be turn off.

All Video Projectors have Power, Status, and Lamp Lights. LED lights are in different colours, Red and Green.  The lights blink and times they blink have different messages for users.
When the NEC Projector status light blinks five times on red, this means 'Over Heat Temperature' on the video projector or that one of five fans has a problem.

Notice: If you use your video projector as a portable device, please turn off the power button in the control panel or remote control and let it cool down before you move it or repair it.
For troubleshooting, the Video Projector put it face down then unscrew all the screws in the bottom and the bulb's door too. On the bottom of the video projector, look at the four sides for any screws and unscrew them. Now you can take off the top cover of the Video projector (all brands are the same).

You have to close the bulb's door.  It will be at the bottom of the video projector or in some models, find a sensor door in the top.  Push on the sensor and at the same time, plug-in the power cable to the video projector and press the power button to turn on the video projector. Look at the fans to see which fan has not yet started.  If the fan is not working, stop before the video projector turns off automatically. To avoid further faults, please carefully disconnect all connectors, especially the flat cable, to check which side of the cable is up. 

Unscrew all the screws to access the spoiled fan and replace it.  If you don't have a new fan, use the oil spray (60) to clean the spoiled fan so that it runs better and use it again (but it's not guaranteed to work as well as a new fan).

I hope this post was helpful and that I helped solve your problem with the Video Projector.  Please share this with your friends on social media.


Wednesday, June 10, 2015

Viewsonic Vx2235wm LCD Monitor NoPower


It is recommended that you watch video on maintenance
training.

Viewsonic Vx2235wm 


Viewsonic LCD Monitor NoPower that means the monitor unable to turn on. We are going to test by another power cable and socket to make sure they are not faulty. 

Better we use soft cloths to covering the table to avoid the happening crash on LCD Screen or front cover. Put the monitor face down on the table and unscrew all screw from back cover then take off the stand and the back cover. 

For access to Boards needs to take off four lamps connectors and unscrew the eight screw the aluminium cover. We can see two boards that the right side is MainBoard and the left side is PowerBord that they connected with nine pins voltages.

And in this video we can see  two Flat cables that connected between the mainboard's output and  LVDS Screen input. Usually, mainboards have one output to LVDS( one Flat cable).

After about one year of being used any LCD monitor needs maintenance. One of the power board duties is provided +5V.

For this, you need a Rectifier Diode and three Filter Capacitor because you will usually see some bulged capacitors. 

We have to exchange the capacitors in the troubleshooting progress. If you can't find the same capacity of capacitors it is preferable to replace with a higher capacity of Capacitor.

I hope this post was helpful and that I helped solve your problem with the Viewsonic LCD Monitor.  Please share this with your friends on social media.


Dell E177Fpb LCD Monitor BackLight


It is recommended that you watch video on maintenance
training.


Dell E177Fpb LCD Monitor


Troubleshooting Dell E177Fpb LCD Screen Monitor when the Monitor power LED is on at blue but we unable to see the data on the screen. If we use the flashlight on the screen we able to see data on the screen. 

we must know what is the problem and we need know how works the monitor. We are going to talk about how work the monitor on LCD Screen.

The LCD Screen Including the two Lamps on top and bottom that the lamps make the light on LCD Screen we able to see the DATA on the LCD Screen, what happening if the lamps don't be on?

That's easy to answer.  If you have an LCD Screen without a backlight that means we have DATA on LCD Screen, but we are unable to see the DATA because the LCD Screen is dark. We need to know what happens on the LCD Screen when it is dark.

Possible causes:
1- One or two lamps are spoiled
2- Inverter unable to make voltage that needs to turn on the lamps.
3- Power board doesn't provide +12V to start the Inverter.

These three causes of backlight problems can be further explained: For example in number 1: 
A) The Lamp has been burnt. 
B) The Lamp's connector doesn't connect probably.  
C) The Lamp's cable is broken. 

We have to check these possible causes one by one to find the reason for the fault. 

In this video, you see the bulged capacitors.  You can find them easily by looking at the board.  After replacement  of the Capacitor, we are done with the troubleshooting.  With this knowledge, we able to repair all monitors that don't have a backlight. I further explain more about the other two reasons in 


Tuesday, June 9, 2015

Canon Fax L140 Print Dirty

Canon Fax L140


How to Repair Canon fax laserjet 140 when the print is dirty?

I have a fax machine prints when the page is tarnished and dirty. If with the flashlight, to look inside the fusing easily can find the film fusing is torn.

Troubleshooting The device is finished although it is simple, but the result of years of experience. If you see the video carefully, the open frame on the right and left rear frame to do the video.
By accessing the Fuser and fusing film's opening, we can replace them.

I met repeatedly with printers that have already been replaced fuser film, but again the same problem emerged. Delivered again by the use of counterfeit parts and don't using grease fireproof occurs.

After assembling the device and set it up, found out at the time of printing, the printer will smoke. Do not worry about the smoke out, then will be cut. Recommended steps are shown in the video and video this link to be taken.


Good luck and meet again.


Wednesday, May 20, 2015

Canon BJC-50/55 Error Codes


Canon BJC-50

Canon BJC-55


How to repair Canon BJC-50/55 Error Codes 

Most objections emerged in inkjet printers, the codes are displayed to inform the user and the repairman arrives.
Basic troubleshooting in these printers, done by reading codes.
Repairs carried out by the solutions proposed in the table.


LED Power
LED Error
Beeps Times

Error
Solution
On
On
1
Paper finished
Add Paper in the cassette
On
On
2
Paper Jam
Clear Inside paper jam
On
On
3
Cartridge
Reinstall Cartridges
On
On
4
Install Cart.
Reinstall Cartridges
On
On
6
Low Battery
Recharge The Battery
On
On
Alternate
No Battery
Recharge The Battery
On
On
1
Feed Error
Check Paper
On
On
2
Low Ink
Replace Cartridge
Blinking
On
3
Position Cart.
Reinstall Cartridges
Blinking
On
4
Low Battery
Recharge The Battery
Blinking
On
5
Absorber Full
Replacement absorber kit and reset counter
Blinking
On
6
Failed Battery
Replace The Battery
Blinking
Blinking
1-12
Services
Service Require


Tuesday, May 19, 2015

Canon BJC-70 Error Codes


Canon BJC-70


How to Repair Error Codes Canon BJC-70


Most objections emerged in inkjet printers, the codes are displayed to inform the user and the repairman arrives.
Basic troubleshooting in these printers, done by reading codes.
Repairs carried out by the solutions proposed in the table.


Error
Problem
Solution
C1
Absorber Full
Reset the Counter
C5
Low Battery
Recharge The Battery
E1
Paper finished
Add Paper in the cassette
E2
Paper Jam
Clear Inside paper jam
E6
Print Head
Install Print Head Properly
FC
Low Battery
Recharge The Battery
F12
Temperature
Stop print for while
F13
Print Head
Install Print Head Properly
F14
Absorber Full
Reset the Counter
Blinking
Print Head
Service Require


Subscribe in Reader